Pencil Drawing For Beginners
Drawing isn’t just about creating images on paper—it’s a mental workout. Engaging in drawing regularly can improve your memory, imagination, and concentration

Materials Required:
Beginner Drawing Materials List
If you’re just starting to learn how to draw, you’ll want simple, affordable materials that allow you to experiment without overwhelming complexity.
Essential Materials for Beginners:
*If you want a comprehensive list of materials for advanced artists, click on this link here! (coming soon)
Pencil Drawing For Beginners
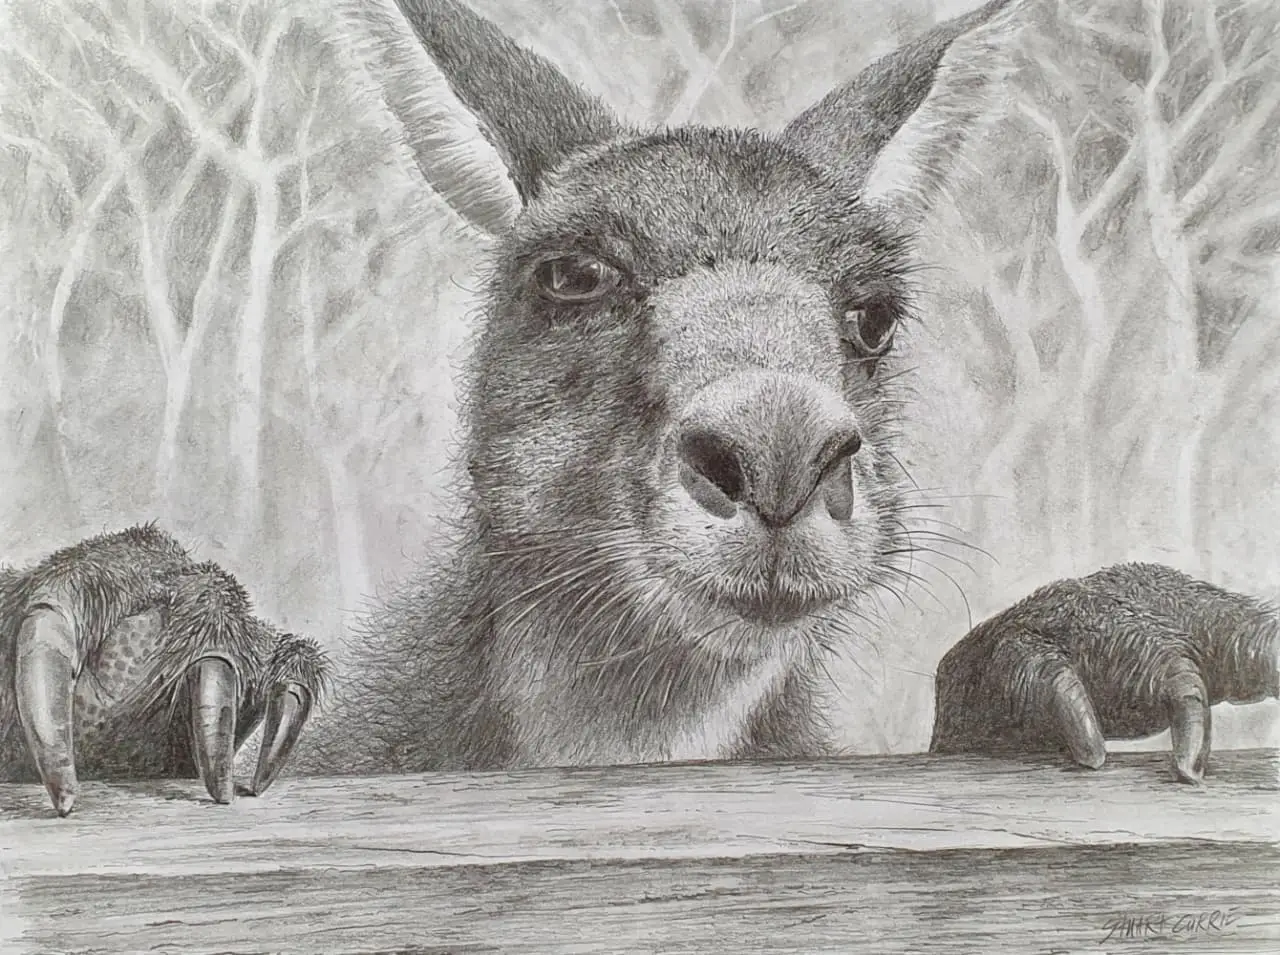
The Best Koala Drawing – A Journey of Patience and Skill

This pencil drawing of a koala took me over 40 hours to complete! Of course, it takes years of practice to reach this level, but I started my journey in the same place as you—an absolute beginner, holding a pencil and wondering where to start.
Why Drawing is a Great Place to Start
Do you want to know what the best thing about drawing is? It’s one of the most accessible and affordable ways to begin your artistic journey. When you’re just discovering the wonderful world of art, you might wonder whether to pursue drawing or painting. While both are rewarding, diving straight into painting can quickly become an expensive endeavour.
No matter which medium you choose—watercolour, gouache, acrylic, or oil—if you invest in artist-quality materials, you’ll feel the hit on your wallet. A full palette of professional paints can easily cost as much as your weekly groceries. Of course, you could opt for a cheap $2 shop paint set, but the quality will likely be poor, leading to frustration.
Drawing, on the other hand, is incredibly budget-friendly. To get started, all you need is a few pencils, a sharpener, and some A4 printer paper. Notice that I didn’t mention an eraser? That’s because erasing too often can hinder your progress—but more on that later.
The Benefits of Drawing: More Than Just a Hobby
Drawing isn’t just about creating images on paper—it’s a mental workout. Engaging in drawing regularly can improve your memory, imagination, and concentration. Here’s how:
Why Mastering Drawing Helps in Other Art Forms
“To become a master painter, you must master drawing first.”
This statement isn’t entirely absolute, but it holds a lot of truth. If you aspire to be an abstract painter, mastering drawing may not be essential. However, if realism or representational art interests you, then drawing is your foundation.
Understanding perspective, proportion, form, composition, tone, and shading, all begin with drawing. These principles are crucial whether you’re sketching a still life, painting a portrait, or even sculpting a figure.
Let’s Start Drawing!
Lesson 1: Basic Shapes and Hand Control

In the drawing above, I draw random free forms using various pressures on my pencil.
After I finished the lines, I looked for areas that interested me and I applied gentle pressure with overlapping lines to produce tonal areas. Increase pressure on the pencil to get grandulations of tone (deeper or darker colour).
This approach to drawing helps you understand how to manipulate pencils to create desired outcomes and to gain confidence as you practice. This could be a first step before drawing circles, rectangles, triangles and squares.
To begin, loosely draw various-sized shapes on a sheet of paper. The key rule: do not erase. Why? Because every mark you make informs your learning. Your ‘mistakes’ will guide you toward better decisions over time. By practicing simple shapes repeatedly, your lines will become steadier, and your understanding of form will improve naturally.
This exercise helps you:
Spend hours perfecting circles, triangles, rectangles, and ovals before moving on. Being able to draw basic shapes accurately is a fundamental skill that will serve you throughout your artistic journey.
Lesson 2: Light & Shadow – Understanding Form

In the drawing above, I applied various pressures on my pencil to create different tonal values to represent the highlights and shadows.
Using tonal values transformed my original drawing of a circle (flat surface) into a sphere (solid object).
A flat circle remains two-dimensional, but when you add shading, it transforms into a sphere—appearing three-dimensional. The key to this transformation lies in understanding light and shadow.
What is Light?
Without light, we wouldn’t see colours or forms. There are two main types of light:
The way light interacts with an object determines its highlights and shadows.
Practical Exercise: Observing Light & Shadow
Try this simple exercise:
Now, repeat the experiment with a matte (non-glossy) surface. Notice the difference? Without reflection, the shadow appears darker, and the overall contrast is greater.
Drawing Exercise: Creating Form Through Shading
Lesson 3: Perspective – Creating Depth
Perspective is what makes a drawing look realistic. Without it, objects appear flat and unnatural.
1-Point Perspective
Imagine standing on a straight road looking at telephone poles receding into the distance. The closest pole looks large, while the ones farther away seem to shrink. This happens because all parallel lines converge at a single vanishing point on the horizon.
2-Point Perspective
Now, imagine standing at the corner of a building. You’ll see the walls extending in two directions, with both sets of parallel lines meeting at different vanishing points. This method is used to draw realistic buildings and objects from an angle.
Perspective Exercise
Final Thoughts: The Journey Ahead
Mastering drawing takes patience, practice, and persistence. But the rewards are immense. By starting with simple shapes, understanding light and shadow, and applying perspective, you’ll develop a solid foundation for any artistic pursuit.
Remember:
Now, grab your pencils and start drawing! Happy sketching!
Drawing isn’t just about creating images on paper—it’s a mental workout. Engaging in drawing regularly can improve your memory, imagination, and concentration
keep up-to-date with our latest posts
No Spam, Ever.